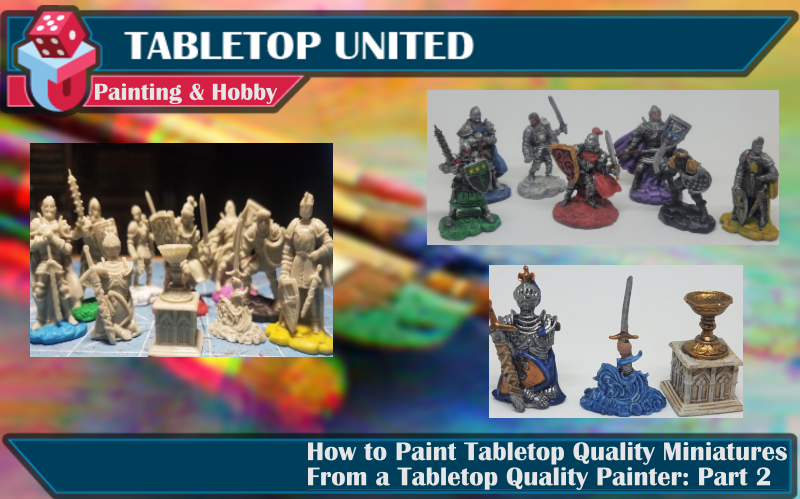
How to Paint Tabletop Quality Miniatures from a Tabletop Quality Painter, Part 2: Painting Your Miniatures
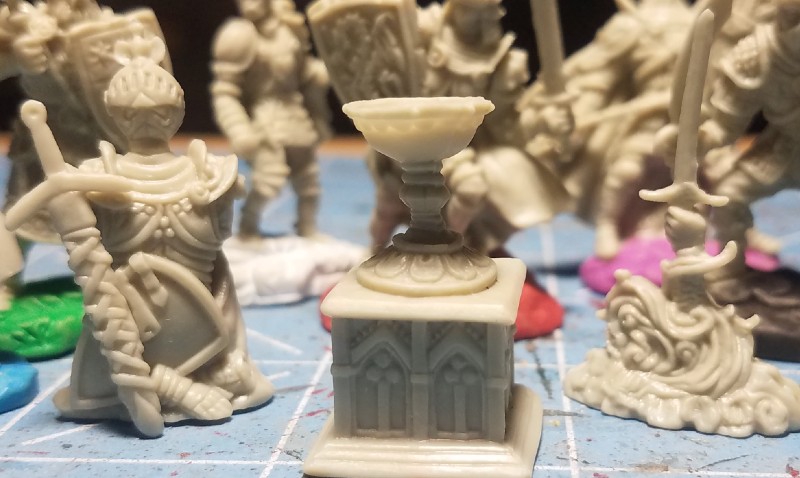
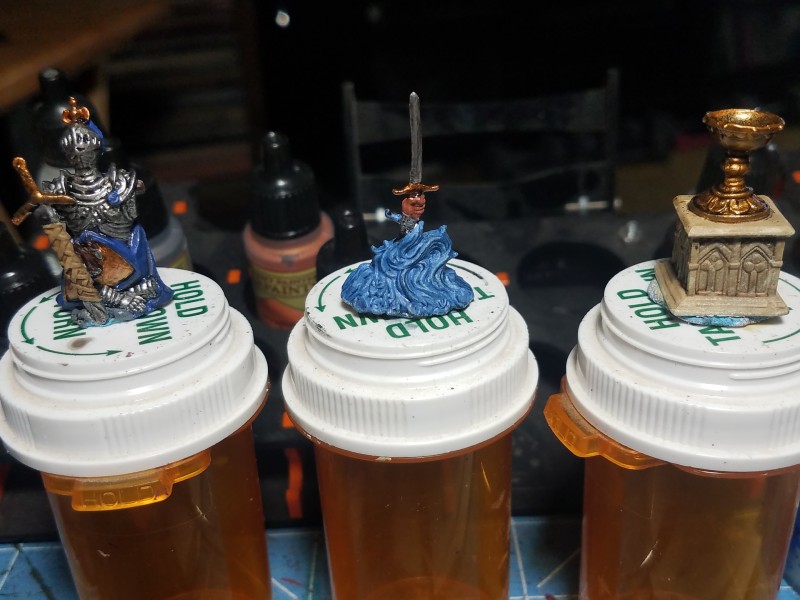
Now that you have your supplies and your minis are prepped and primed (Part 1 Supplies, Prep & Priming), it's time to get some paint on them! Make sure that your primer is good and dry before moving on to adding paint, I usually give it overnight at least so that there is no tackiness left anywhere on the model. At this point, you can leave your miniatures on the painting stick from priming them or transfer them to something that's easy to hold so that you can get to every angle of the miniature without actually touching it. I like to use old prescription pill bottles for this. They are comfortable and solid in my hand without being too big and accomodate most miniature sizes.The most common method that I use for getting my miniatures painted up to tabletop quality is a five step process consisting of: basecoat, wash, drybrush, highlights, and sealing. Remember that the number one ingredient to successful painting is confidence. I hope that by providing you with these basic techniques, you will have the confidence to convert that grey plastic in your game boxes into something that pops on the tabletop! I will provide pictures as I talk about the different steps in the process. Keep in mind, we are painting miniatures. Perfection is not necessary and most mistakes won't be super noticeable to the naked eye when the minis are on the table top. The camera, on the other hand, is a bit less forgiving!
The first step in getting your miniatures painted is applying the basecoat. This is simply laying down colors in the areas that they belong on the miniature, also known as blocking in when oil painting. At this step in the process, you really don't need to worry much about getting all of the fine detail just perfect, you really just want to get your base colors down where you want them to go on the miniature. When preparing to paint your base coat, put a small amount of paint onto your pallet and mix in a drop or two of water to get a smooth, even consistency. Most paints applied directly from the pot are a little thick and may leave brush stroke marks on the miniature or, in some cases, obscure detail. It is better to do a couple of thin, even coats than one thick coat. Your brush size isn't super important for this step, use something small enough that you have control over where the color is going but large enough to cover an area without having to go back to the paint constantly. I tend to use a #2 size brush for most basecoating applications. Just keep applying layers, allowing a few minutes of drying time in between each layer, until the saturation of color is to the level that you want. Also, keep in mind that we will be using washes to deepen the shadows and drybrushing to highlight the details so you want this color to be a good solid base to work from. Smooth, even coverage is what we are looking for here. Try to get the colors only in the areas that they need to go, however if you go outside of the "lines" a little bit here and there, it's ok. You will be able to fix that in later stages. Perfection is not necessary in any step in the process.

Once you have the colors all where they belong, it's time to apply a wash. A wash is a very thinned down paint specially formulated to flow well. When you apply the wash, it will darken your miniature a bit overall but what it really does is pool in the crevices and recesses, deepening the shadows. While there are a variety of options out there for washes, I would recommend to keep it simple and start out with one darker wash in a black or dark brown. From Games Workshop, I use either Nuln Oil or Agrax Earthshade fairly extensively. To apply a wash, simply dip a medium brush directly into the wash and wipe off any excess. Then paint the enire miniature with the wash. I usually paint the whole mini in one go and see where the wash is pooling. If it looks like too much in an area, soak a little back into your brush. If there is not enough in an area, add some more or push it around with your brush until you move it around to how you like it. Your mini should look a little dirty at this stage, that's ok! It will look better after it dries and you will be able to adjust the amount of grime during the drybrushing and highlighting phase. Once you have everything how you like it, leave your miniatures to dry completely. This can take a bit of time for the areas where you have the most pooling. I like to do my washes at the end of the day and leave everything to dry until my next painting session. It shouldn't take more than an hour or so, but I like to make certain that my miniatures are good and dry before I do anything else.
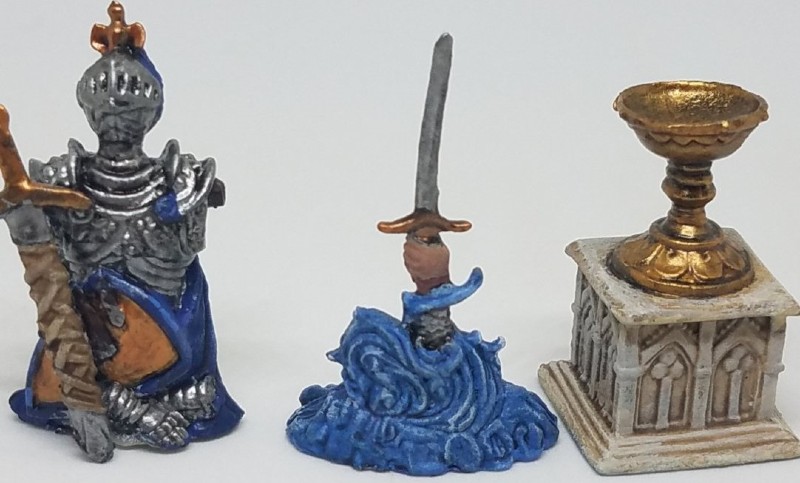
Once your minatures are dried, take a look at them. The wash will have really deepened the shadows in the deep recesses and a lot of detail (some that you may not have even noticed before) is more defined on the miniature. By washing the whole piece, you may notice that the color transitions from one area to another are not as glaring as they were before and are now a bit more muted giving an overall cohesion to the model. This is what we are looking for. In the next step, we're going to make those details stand out just a little bit more.
This is the step in the process where the brush that you use really does matter. You'll want something with a flatter, wider tip (not a sharp point) and maybe in a couple of different sizes for dry-brushing different sized areas. Do NOT use a brush that you care about for drybrusing! Drybrushing will push paint up into the bristles and spread the brush apart. This makes it great for drybrushing but ruins the brush for any other uses.
To get started, select a paint that is a lighter shade than your basecoat. Drybrushing adds highlights, or areas where light hits the object and illuminates certain parts. We use a lighter/brighter shade of color to simulate this. When drybrushing, we're going to use paint straight out of the pot without thinning it. Dab your brush into the paint and then wipe the brush in a back and forth motion on a paper towel until very little paint is coming off of the brush. The object of this technique is to only leave a little paint behind on the raised edges of the miniature to really make the details stand out. Once your brush is prepared, you will want to drag the brush across the detail of the miniature. I usually brush in a top-down motion with a little bit of an angle to simulate where sunlight would be coming from. Keep brushing until you are satisfied with the effect. You can also highlight large flat areas of the miniature with this technique by adding a little more pressure to your brushing and working from the center of the area outward being careful not to lighen too much towards the edges.
After your drybrushing has had some time to dry, it's time for the final steps. Remember when I said that you'd have the opportunity to correct mistakes later? Now is that time! This is the part of the painting where I tend to use my smaller brushes (0 and 00 typically). For cleanup, I generally dip my brush in the pot for a small bit of paint and put it on my pallet then drip the brush in my brush water just to get it a little wet and mix the two together. Now you have a thinner paint than out of the pot, but not as thin as your basecoat. Look over the miniature and decide what areas could use a little touchup and fix them as best as you can. You can also add some extra highlighting in the same way by using a lighter shade than your dry brush and very lightly brushing the very highest edges of the areas that you want to highlight.
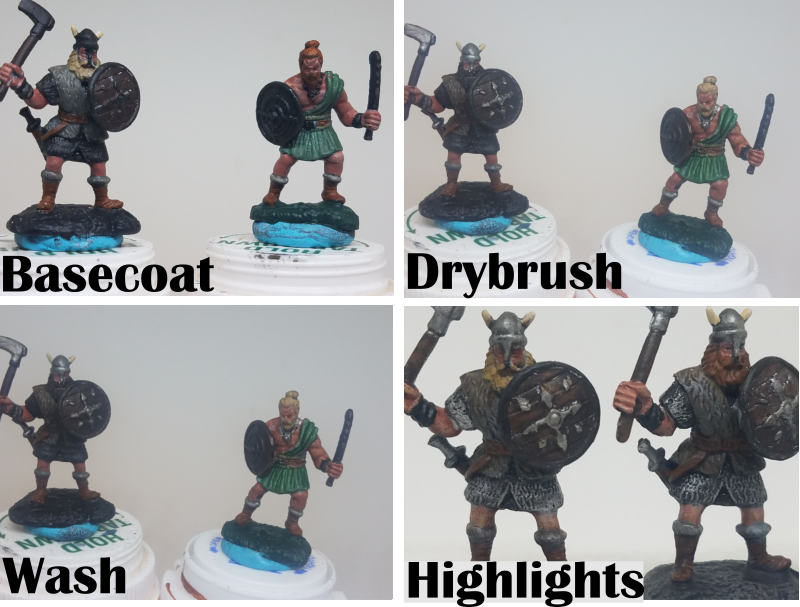
When your drybrushing has had a good chance to dry, you can seal your miniatures. This is totally opitonal, but a good seal will keep your paint job intact longer and also helps your miniatures to continue to look their best. You put a lot of work into making them look awsome, you should protect that effort! I like to do two coats of sealer on my models, a gloss coat for maximum protection and a matte finish to dull down the shine. The gloss coat also helps to keep the matte coat from fogging which it can sometimes do under certain atmospheric conditions. You can really use whatever varnish you prefer but I really like Testor's Gloss Cote and Dull Cote. The gloss doesn't really matter as much, but I feel like Dull Cote gives a superior finish to my models and, similar to the wash in the earlier steps, the finish helps to meld things together a bit and make transitions not quite as harsh. As always, give your miniatures time to dry after each application.
Cleaning Your Brushes
One last thing to touch on is cleaning your brushes. During your painting session it's good to have a jar or glass of water to rinse your brush off with between colors. I always make sure that I have all of the color out by rinsing then wiping on a paper towel until all of the color is gone. When you finish painting for the day, it's a good idea to wash your brush in warm (not hot) water with some mild dish soap and rinse it out completely, Feel around in the bristles and make sure that you are getting all of the paint out in the process. Let your brushes dry in a stand with the points up to prevent the points from developing weird shapes and angles and wild bristles and you'll be good to go for next time.
Thanks for reading! I'll be back soon with Part 3 of my series where I'll give you some "advanced" tips and tricks that I've learned.
Stefan Yates
Stefan Yates is a professional in the Office of Diversity and Inclusion at Kansas State University. Finding ways to work gaming into work, he serves on the university’s Alternate Reality Game Committee and is a co-Faculty Advisor for the Board Game Club. He is also a PhD student whose field of research is Gamification in Student Programming. He enjoys playing (and mostly losing) almost any type of game and likes to work in multiple game sessions per week whenever possible. An avid solo gamer with an additional interest in tabletop miniatures games, the stay-at-home orders of the pandemic were not particularly concerning as there was always painting to do and terrain to build. Stefan is also a book and movie collector and a huge football fan (go CHIEFS!)